- Author Antonio Harrison harrison@cultureoeuvre.com.
- Public 2024-01-09 15:32.
- Last modified 2025-01-22 21:44.
If you have thought about writing your own pictures, but found hundreds of reasons to put it off, you should start right now. Drawing is not difficult and not as expensive as you might think. Moreover, the process is very addictive and energizing.

It is necessary
- - canvas;
- - oil paints;
- - synthetic brush No. 1;
- - synthetic brush No. 4;
- - synthetic flat brush # 10;
- - palette;
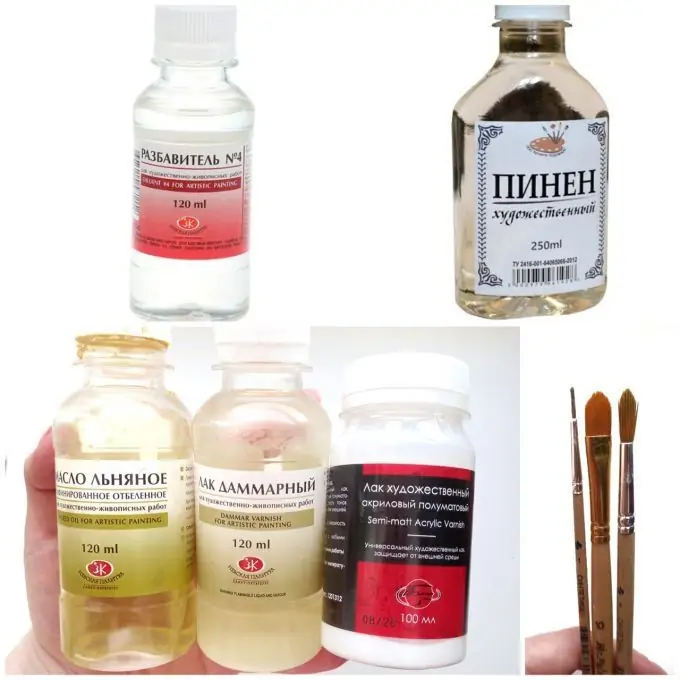
- - thinner No. 4 (pinene) or linseed oil;
- - varnish for oil paints.
Instructions
Step 1
Preparation
We choose a canvas as you wish, in stores there is a huge selection of shapes and sizes. For beginners, I recommend taking a primed canvas on a stretcher so as not to prepare it. If you plan to frame the finished painting, take a canvas on cardboard.
Oil paints can be more expensive if the budget allows, but basically they are all in about the same price range. If cheaper - Vista-Artista, more expensive - "Master Class". Do not collect 40 tubes at once, you can choose a set of 24 small ones and mix. If you want to continue painting, you will buy the necessary ones.
I recommend varnishes, oils and thinners from the Nevsky palette (also a budget). You can combine products from different companies.
It is best to take a soft brush, such that when it is carried over the surface, the pile does not crumble in different directions, but keeps its shape. Good brushes cost in the region of 150 - 400 rubles. (from the smallest to the larger). You can wash the pile during work with a thinner or oil, depending on the material you have chosen, immediately (immediately!) After work, otherwise the paint will set on the next day, and the brush will most likely have to be scrapped.
If you wish, you can purchase an easel, on it after work the picture will remain dry. Keep in mind that the oil dries for a long time, so I advise you to find a place for this picture, where it will not interfere with you.

Step 2
Sketch
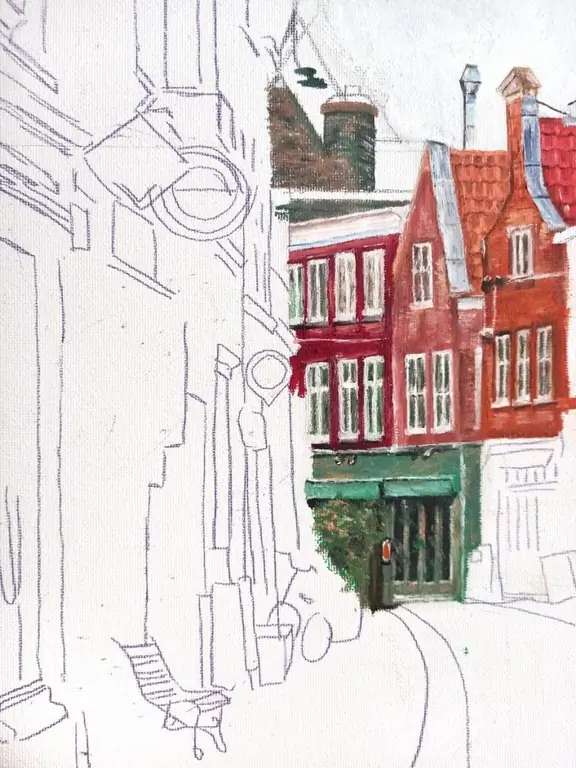
When all the tools are assembled, you can sit back and get to work. A sketch for a drawing is made with a pencil or charcoal. I advise you to take a plastic pencil, it will not mix with paint and stain the color.
Personally, I like to paint and play with color more than to pore over the sketch, so I sometimes use carbon paper: I print the picture to fit the canvas and translate the main lines.

Step 3
Underpainting
It is a substrate - a thin layer of paint, with which the main details of the picture are outlined. Roughly speaking, a draft.
For this step, the paint is mixed with a thinner to make it runny. The underpainting is done with a medium or large brush.
Whether you use flaxseed oil or choose a thinner is up to you. But keep in mind that with a thinner, paints can lose their saturation, and after linseed oil the layer has dried, you can wait for weeks.
I immediately started working without underpainting, but this is more difficult. In other words, if you feel the color well, you can immediately knead the paints on the palette and apply.
By the way, instead of a palette, I use cardboard box lids, it is more convenient, because then it is not a pity to throw it away.
Drying time: from day to 4 days.
Step 4
Main part
Here we work according to taste: light, color, shades. Unleash your imagination. But! It is imperative that when applying each new layer, you need to wait for the previous one to dry, otherwise the paint may blur and mix during application. This process can take approximately 2 weeks, depending on the thickness of the layer.
Small details and thin lines are drawn with a thin brush either in the process or with the last layer.
It takes from six months to a year to dry the finished picture (we count from the moment of completion of the very last layer).
Step 5
Varnishing
The varnish can be glossy, matte or semi-matte, choose according to your taste.
Before the established drying time, the paints should not be covered, otherwise they will begin to dissolve and spread. From my own experience, I will say that even after a month of drying, the paint will float, do not risk it.
Drying time: up to 2 days.


